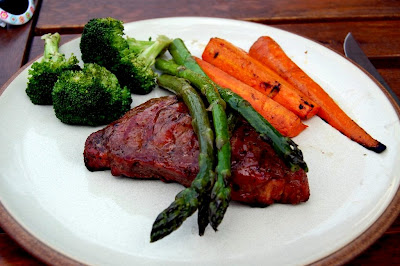
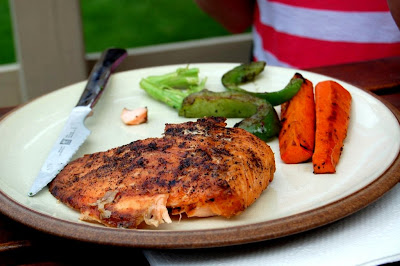
Guest Post: Grilling Tips and "Lake and Steak"
Happy Friday, everyone! I have a really special guest post for you today from David, a good friend from college (and one of the groomsmen my upcoming wedding!) and a grilling enthusiast. Since I don't have too many grilling recipes on Taste As You Go, I thought it would be fun to have David share one of his favorites with you, as well as some of his helpful grilling tips.
If you like what you see, then be sure to follow David on Facebook and Twitter... Take it away, Grill Master!
One of my favorite summertime meals in Minnesota is "Lake and Steak," a twist on the more famous "Surf and Turf". In this land of 10,000 lakes, fresh fish is more common than quality seafood, and most of my neighbors spend more time fishing in Northern Minnesota on the weekends than relaxing at home. In the last couple of years, there has also been an explosion of interest in organic, 100% grass-fed beef from small, local farmers (farm-to-table).
After buying a little beef from my neighbor's order for the past several years, I realized that this is the best tasting food one can find. Night-and-day better than even an upscale grocer, at a fraction of the cost. So this spring, I finally procured extra freezer space and recently bought a 1/4 beef from a small farm an hour-and-a-half from the Twin Cities. I was eager to take this mouth-watering steak for a spin on the Weber.
For the purposes of this story, I'll pretend that the salmon was also local and not "fresh from Alaska".
INGREDIENTS
2 New York strip steaks, .4 pounds each
1 salmon filet, .75-1-inch thick
Asparagus
Broccoli
Whole carrots
Green bell pepper
Kosher salt (coarse) or Lawry's Seasoned Salt
Garlic powder
Onion powder
Paprika
Black pepper
Ground or freshly chopped dill
Extra-virgin olive oil
1 small lemon
Now that you've had a chance to review the ingredients you'll need, it's time to fire up the grill!
After cooking with a gas grill for 10 years, I switched to charcoal and have never looked back. It's more fun, and the food tastes immeasurably better... the way the food was meant to taste. I use a mix of Kingsford briquettes and natural hardwood charcoal (Whole Foods sells it for $7/bag). The hardwood charcoal, also known as lump charcoal, is roughly twice the cost but burns hotter and adds a campfire smoke unlike any typical charcoal I've used.
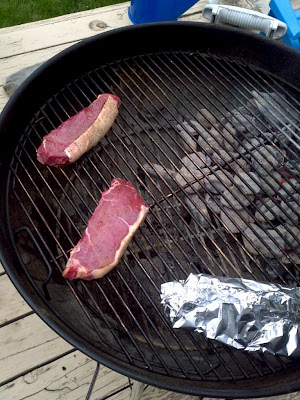
Prep your grill with a generous amount of coal. I used an overflowing charcoal chimney and two sticks of fatwood underneath to quickly set it ablaze. (Use newspaper or an electric starter if it's windy. I would never advocate for lighter fluid due to the chemicals.) After the coals are fiery, don't spread them out. Keep a pile against one side so you have a relatively cooler area for indirect cooking opposite the coals. If you're on a gas grill, then fire up the burners on high on one half but not on the other.
Quick and Easy Prep Work
If frozen, thaw the meat in your fridge ahead of time so it's ready to go. Give it a good 24 hours. Clean and cut all the vegetables. Peel the carrots and cut lengthwise in half or in quarters, depending on thickness. If cut too small, then these will turn to mush.
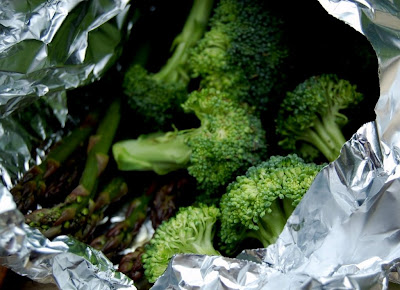
Package veggies in aluminum foil pockets based on how long they'll take to cook. I package the carrots separately as they cook longer than the asparagus and broccoli. Put the cleaned veggies on a big sheet of foil, douse generously with olive oil and toss to coat then add seasoning. I used salt, black pepper, and dill on the asparagus and broccoli and just salt and pepper on the carrots. Nothing on the bell pepper but oil and a touch of salt.
Fold the edges of the foil over the top, so when you unseal the pockets, the oil won't pour out the side. Keep the pockets in tact and do not punctures holes in the top.
The Dry Rub
Combine 1 tablespoon Kosher salt, 1 teaspoon pepper, 1 teaspoon garlic powder, 1/2 teaspoon paprika, and 1/2 teaspoon onion powder. (Optional ingredients that add more zing include lemon zest or basil.) If you want a stronger flavor, you can use the coarse-ground version of these ingredients rather than the fine-ground version.
Amounts are approximate, as I use the eyeball method. Heavy on the salt and pepper and light on everything else gives you the purest flavor of the meat. If you're in a hurry, just use Lawry's Seasoned Salt and pepper.
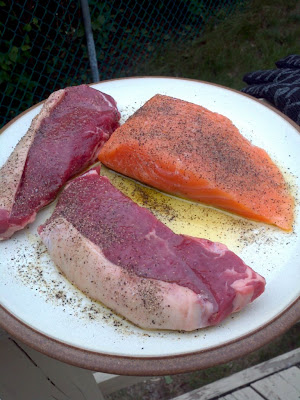
Rinse off the steak and pat dry with a paper towel. On a plate, liberally brush or spoon on olive oil. Then cover with the dry rub. For full flavor, flip and repeat on the other side. For the salmon, liberally brush or spoon on olive. For seasoning, I just used salt and pepper.
Food on the Fire
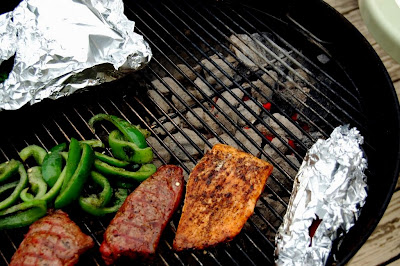
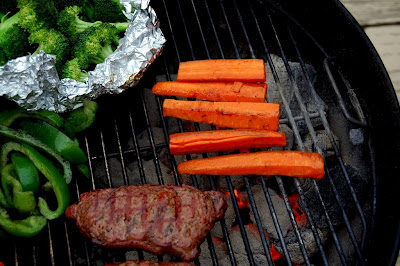
I put the steaks and carrots on first since they take the longest to cook. Generally, you want to put the steak right over the flames to get nice grill marks and sear in the juices before you cook it. Turn it 90 degrees after 30-45 seconds (or longer, depending on how much heat you have) to get nice criss-cross marks. Flip and quickly repeat, then set it aside to a cooler part of the grill.
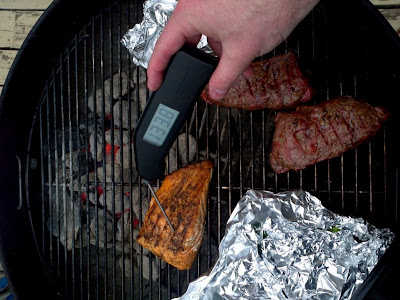
At this point, I add the salmon on indirect medium heat, flesh side down. You can cook it this way for about 7-8 minutes depending on thickness (close the lid so the meat can cook), then flip the salmon when it's easy to slide a spatula underneath it.
The salmon only needs a few more minutes to finish on the skin side. Even though you can judge from appearance and firmness, I suggest using an instant-read thermometer for no surprises. Just don't get carried away... holes allow juices to escape! Try to read the thermometer on the grill but not over the flame. If you take it off the grill entirely to check the temp, it will drop and fool you into overcooking.
After the meat has cooked for about 10-12 minutes, I throw the rest of the vegetables on. The asparagus/broccoli pouch and the carrot pouch each took brief turns over the coals to steam, and then the bell peppers right on the grate, followed by the carrots right on the grate. When placing the veggies right over the flames, be quick about it so you don't burn them. If they are covered in oil, watch out for flare-ups that might scorch the food (or you).
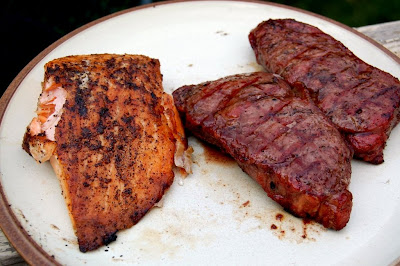
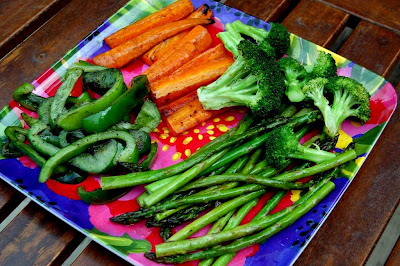
Continue cooking the meat indirectly until it's done to your liking, at least 140°F for the salmon and 130°F for the steak. I cook both to 160°F or more. If you have a good cut of steak, pull it off sooner and cover loosely with a piece of foil. Allow the steak to sit for a few minutes so the juices can settle. While you do that, drizzle juice from the lemon over your salmon and plate with the veggies.
David's Top 5 Grilling Tips
1. Don't mess with your food on the grill until it's cooked for a while and, even then, not more than you need to. It's best to leave meat alone so it cooks evenly and doesn't fall apart, which is why I cook with indirect heat and use the heap of coals strategically. You can get the smoky flavor and grilled appearance without burning your food by paying a little attention.
2. The trick to perfect grilled vegetables is to steam them in foil packets until they're mostly done and then finishing them by opening the packets or moving the vegetables to finish over the coals. Finishing on the coals will give the vegetables a fabulous smoky flavor and will give them gorgeous grill marks.
3. Don't grill fish if your grill grate is new. The fish will stick and become a mess. The best food comes off a seasoned grate because there is oil already there even after you scrape it.
4. Don't use cooking sprays on the grate in attempt to create a non-stick surface. These sprays will create an overly slippery surface and usually contain flavors you may not want in your food. It's better to brush oil on your food to lock in the flavors and let seasoning build up on the grate through plentiful use, just as you would do with a cast-iron skillet.
5. Invest in fire-starting technology, such as fatwood sticks and a butane lighter (or long-handled safety matches) or an electric starter for windy days. You don't want to eat the carcinogens in lighter fluid or have bits of burning newspaper flying around in your yard.
The "Lake and Steak" and grilled mixed vegetables offer an easy, healthy meal you'll be proud to share with your family, or even the neighbors. And, you can have a little bit of the northwoods on your own deck or patio!
Enjoy!
If you liked this post, consider subscribing to Taste As You Go’s RSS feed or subscribing via email so you don’t miss a thing!
